
こんにちは、タカフです。
最近、PWA開発を始めるにあたってAWSで環境構築を考えていて色々WEB記事を漁っていたら、PWA環境に便利そうなサービス「AWS Amplify」というものを発見し、深く読めば読むほど便利そうなので使ってみることにしました。
ということで本記事は、AWS Amplifyでフロントエンドとバックエンドのデプロイ環境を整える、の巻です。
AWS Amplifyとは
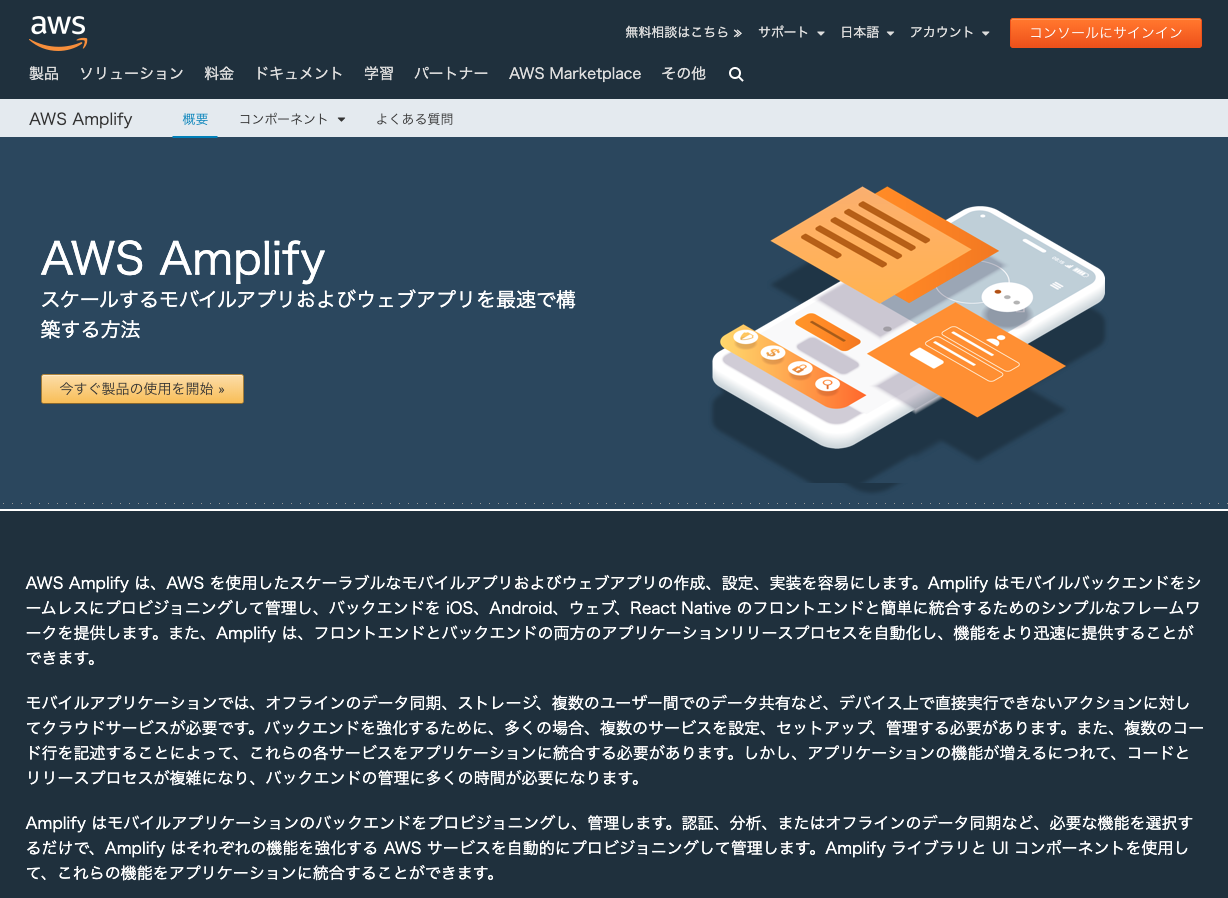
AWS Amplifyとは、一言で言うとモバイルアプリを作るのに一連の機能とさらにはそのホスティングまでやってくれる便利なサービスです。
https://aws.amazon.com/jp/amplify/
僕は『今度作るサービスはログイン認証にはCognito使ったろ』、『PWAだからサーバー側はAPIに特化したAPI Gateway + Lambdaがいいやろ』、『AWS使うならデプロイもAWSで統合してやってくれると楽やで』、なんて考えていたら、AWS Amplifyがそのあたりの機能を全て兼ね備えていて、さらにアプリには必須なその他の機能まであったので一瞬で一目惚れしてしまいました。
これから作るのは自社サービスなので、なるべく最初のうちはランニングコストは低い方がよく、使った分だけ課金のサーバーレス環境というのも大変魅力的でした。
さっそくAWSマネジメントコンソールにログインして、AWS Amplifyにアクセスしてみました。
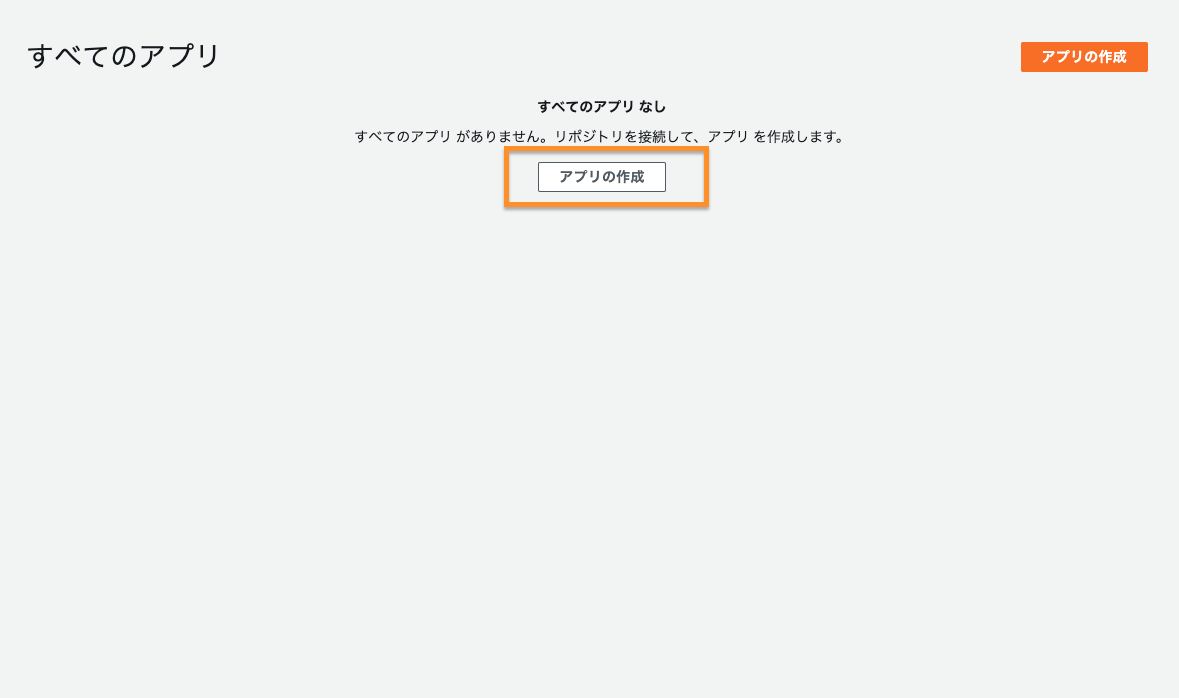
このような画面が出てきます。
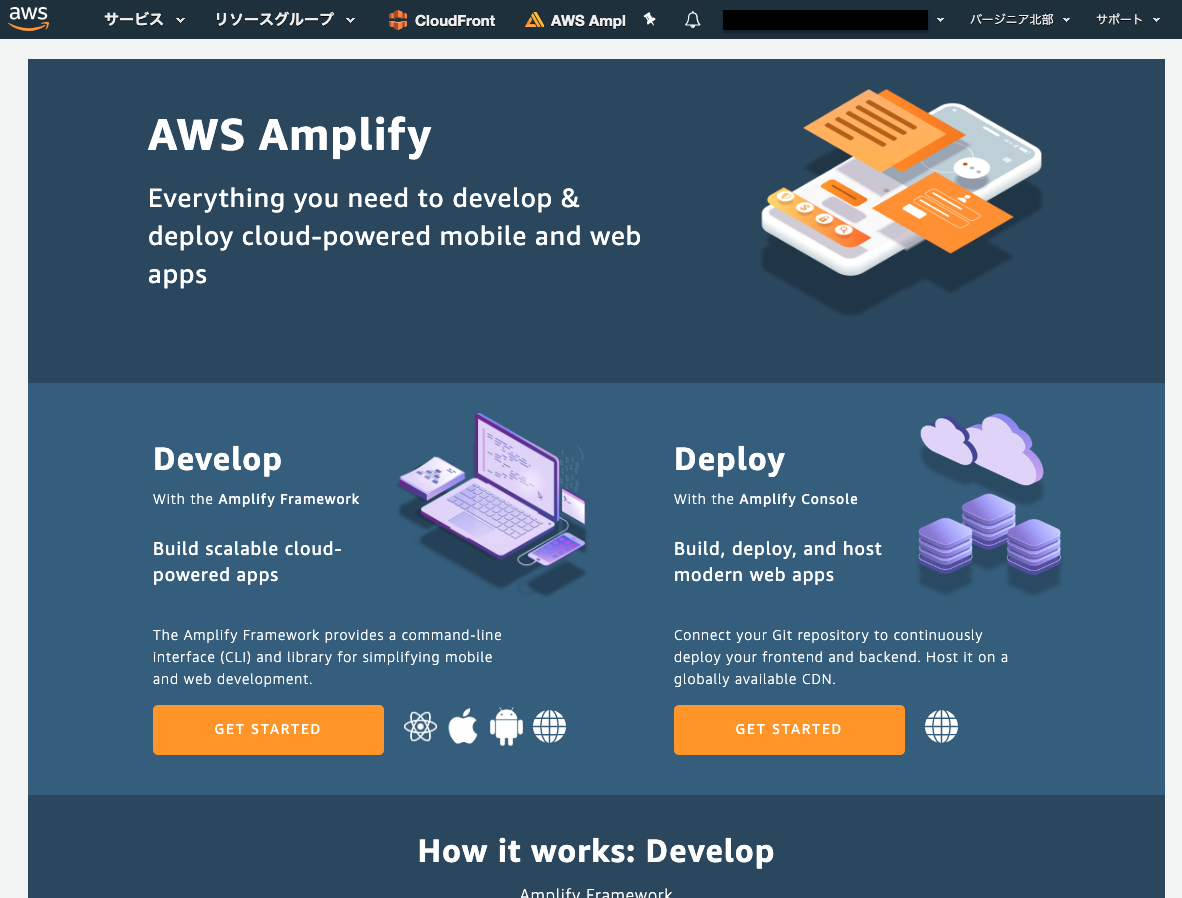
まだAmplify上に何もアプリを作ってないので初期画面となっています。
これからAmplify Developで初期ソースを作り、GitHubに登録して、GitHub上でマージされたらAmplify Consoleでデプロイ、という流れを作っていきます。
AWS Amplify Consoleでデプロイ環境を構築する
amplify cliをインストールする
amplifyの開発を進めていくには専用のCLIが必要です。
https://aws-amplify.github.io/docs/
こちらにインストール方法が書いてます。npmコマンド一発です。簡単ですね。
$ npm install -g @aws-amplify/cli
amplify cliのアカウント初期設定
ローカル環境からamplifyにpushしたりするのにIAMが必要です。それが以下のコマンドでセットアップ出来ます。
$ amplify configure
Follow these steps to set up access to your AWS account:

Sign in to your AWS administrator account:
https://console.aws.amazon.com/
Press Enter to continue
実行するとブラウザでAWS マネジメントコンソールが開くのでログインします。ログインしたらターミナルに戻って、Enterを押して続けます。
Specify the AWS Region
? region:  ap-northeast-1
Specify the username of the new IAM user:
? user name:  amplify-user
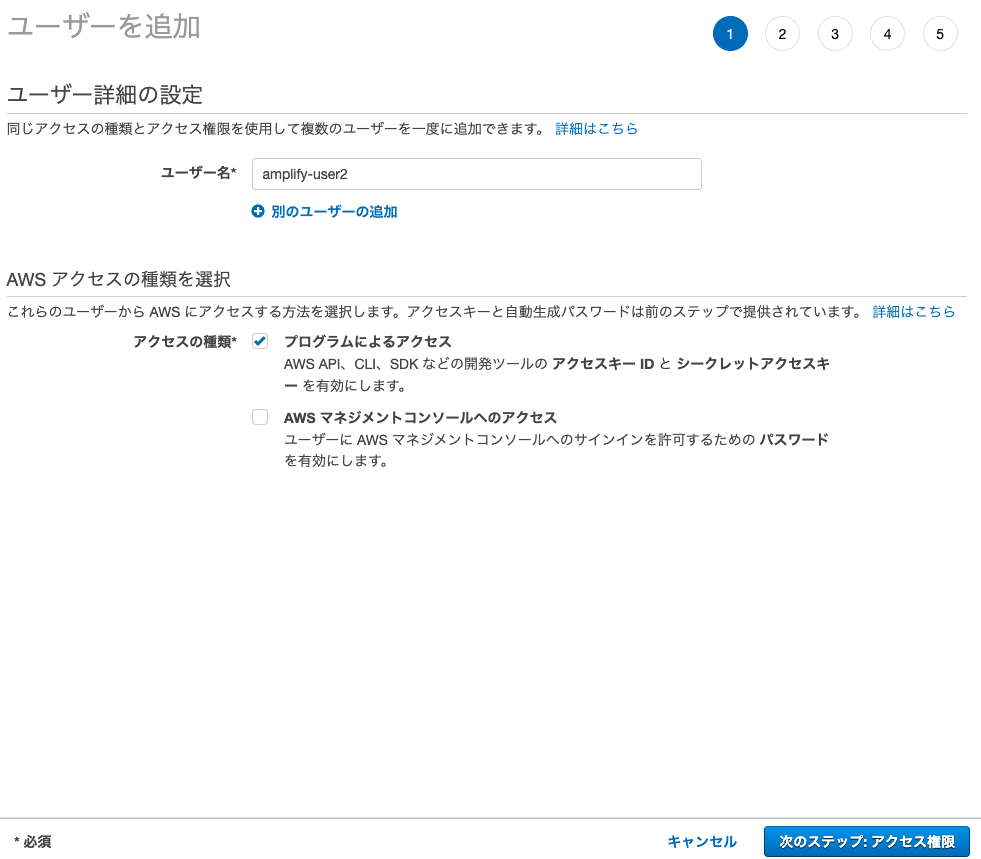
regionは東京リージョンで、今回amplify cliを実行するユーザーとしてamplify-userを作ります。
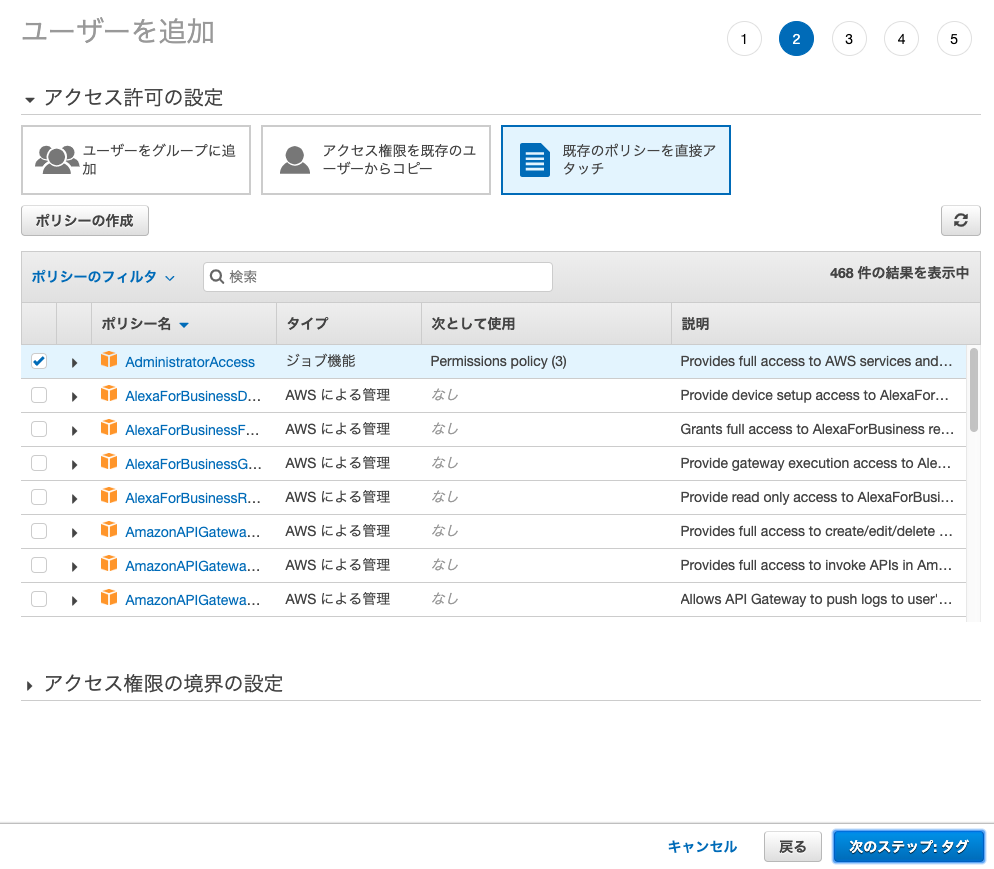
そうすると先ほど、ログインしたマネジメントコンソールからIAM作成画面になって、あとはデフォルトで進めていけば良いだけとなってます。(下記画像はamplify-userが作成済みだったのでamplify-user2となってます)
IAMユーザーが作成出来ました。
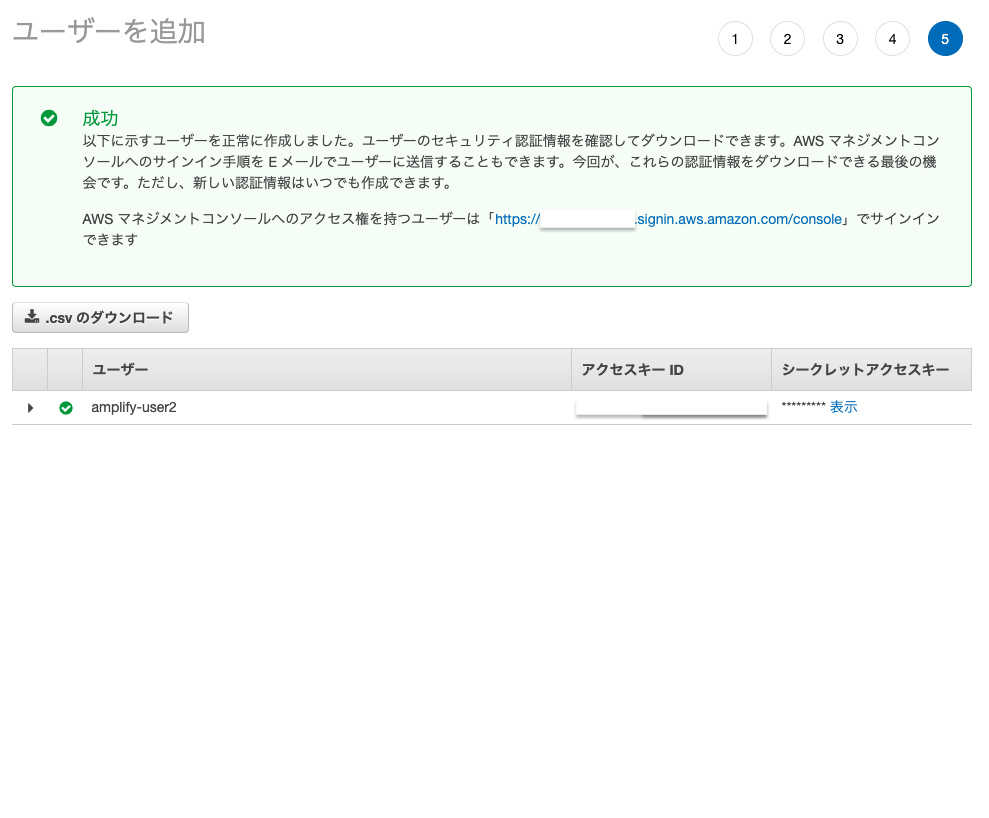
アクセスキーIDとシークレットアクセスキーを保管してください。
ターミナルに戻って続きをしていくと、アクセスキーIDとシークレットアクセスキーを入力するようになっているので先ほど保管した文字列を埋めていきます。
Enter the access key of the newly created user:
? accessKeyId:  ********************
? secretAccessKey:  ****************************************
This would update/create the AWS Profile in your local machine
? Profile Name:  amplify-user
最後にProfile Nameをわかりやすく同じamplify-userにすればセットアップ完了です。
amplify cliでamplifyアプリを初期化
ここでは便宜上amplify-appというディレクトリを作ってそこでアプリを初期化していきます。
amplify initでアプリ構築します。
$ mkdir amplify-app
$ cd amplify-app/
$ amplify init
Note: It is recommended to run this command from the root of your app directory
? Enter a name for the project amplify-app
? Enter a name for the environment suzuki   // これは各人の開発環境名になります。
? Choose your default editor: Sublime Text  // エディタは何でも良いです。
? Choose the type of app that you're building javascript
Please tell us about your project
? What javascript framework are you using none  // framework7を使うのでここではnoneを選択
? Source Directory Path:  src       // デフォルト値
? Distribution Directory Path: dist // デフォルト値
? Build Command:  npm run-script build
? Start Command: npm run-script start
Using default provider  awscloudformation

For more information on AWS Profiles, see:
https://docs.aws.amazon.com/cli/latest/userguide/cli-multiple-profiles.html

? Do you want to use an AWS profile? Yes
? Please choose the profile you want to use amplify-user  // 先ほど作ったamplify-userを選択
⠇ Initializing project in the cloud...
これで初期ソースは完了です。
amplifyアプリをGitHubにコミット&プッシュ
この後GitHub経由でデプロイする為にGitHubに予めプッシュしておきます。
amplify-app というリポジトリを作ってそこにプッシュします。
$ git init
$ git add .
$ git commit -m "first commit"
$ git remote add origin https://github.com/[your-name]/amplify-app.git
$ git push -u origin master
amplify consoleでアプリを作成
amplifyの管理画面で「アプリの作成」を押下します
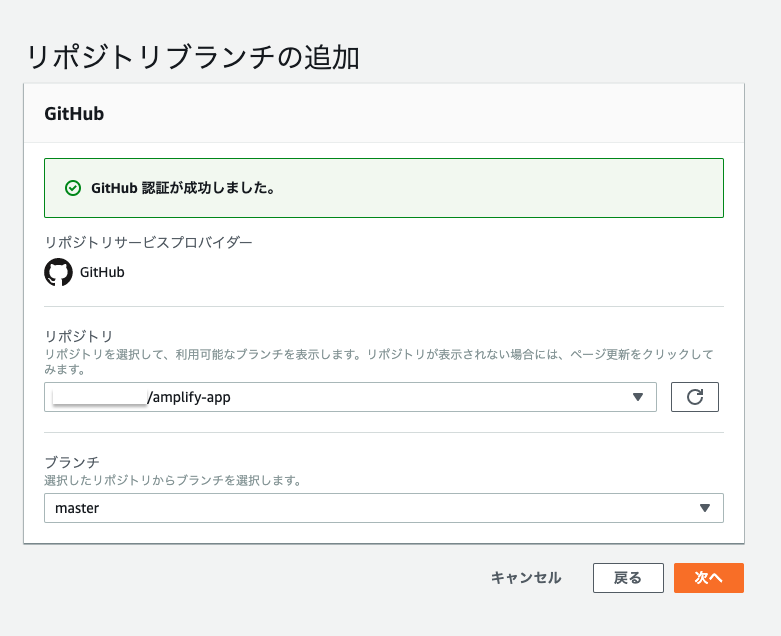
デプロイソースにGitHubを選択してContinueを押下するとGitHub認証が走りますので許可していきましょう。

リポジトリに先ほど作ったamplify-appを選択してmasterブランチを選択します。
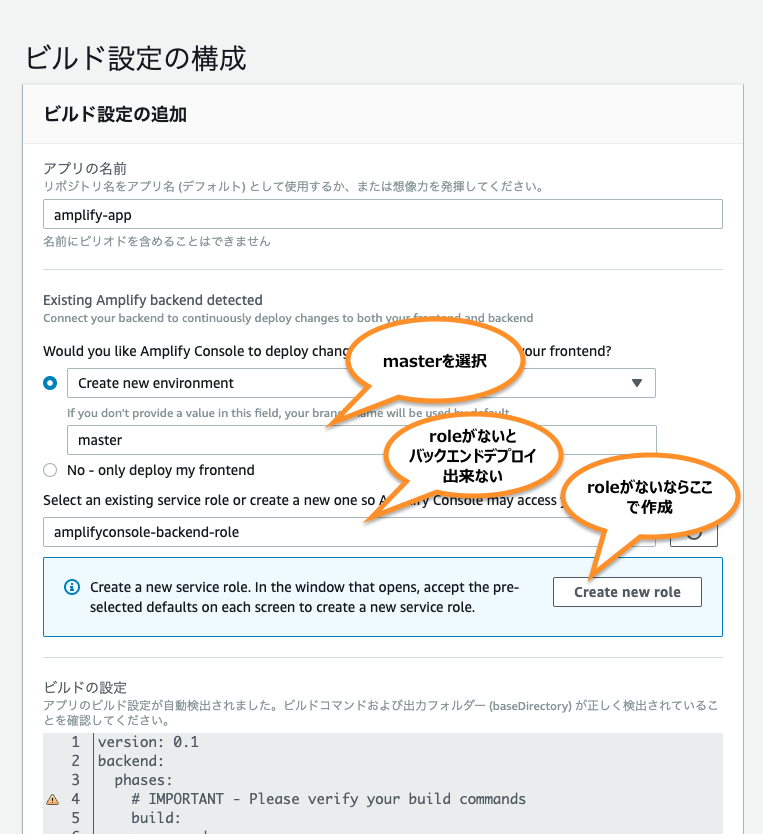
次に、一応ここでは本番環境想定なのでmasterブランチを選択しましょう。この時ロール選択をしますが、初回はここからロールを作成しちゃいましょう。このロールがないとバックエンドデプロイ出来ないのでご注意を。
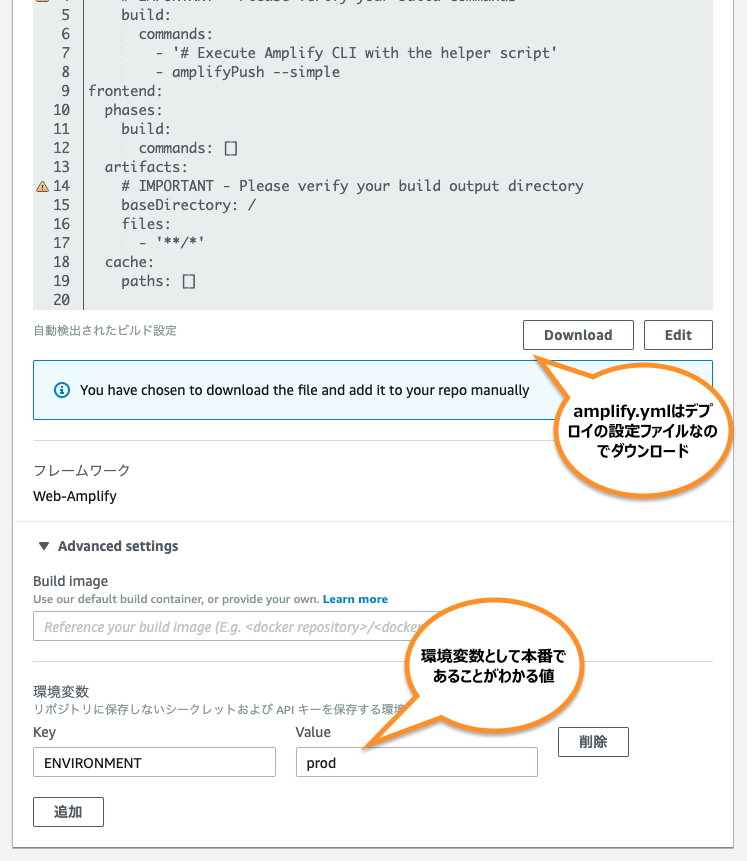
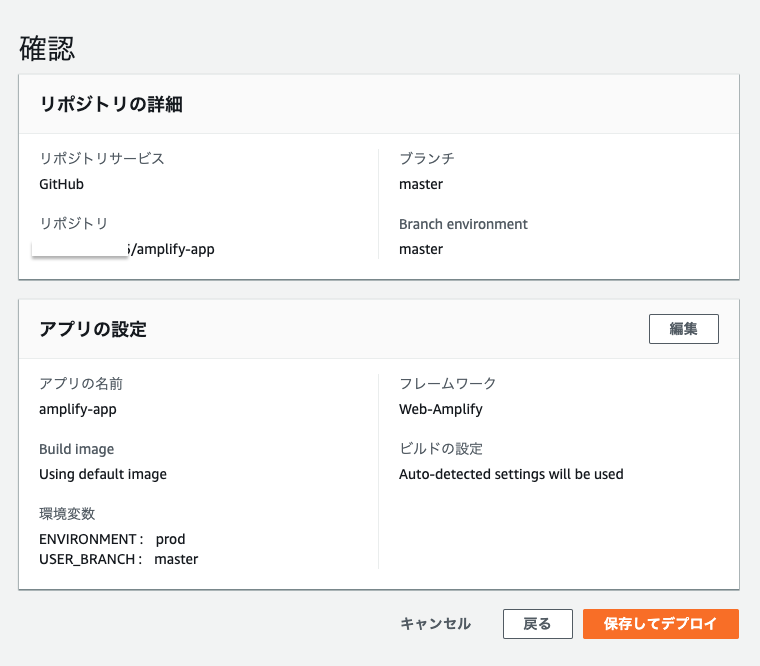
続いてこのyamlテキストはダウンロードしておきましょう。あとでリポジトリに組み込みます。
そして環境変数をセットします。
最終確認画面です。OKなら「保存してデプロイ」です。
ここまででフロントエンドもバックエンドも何もないので何もならないですが、一応ホスティングまでは出来ています。
Amplify Developでバックエンドのデプロイ環境を構築する
バックエンド側では何かしらのAPIを作ってみましょう。
amplify バックエンドAPIの追加
amplify add apiでAPIを追加します
$ amplify add api
? Please select from one of the below mentioned services REST// GraphQLも選択できますが一旦RESTを選択
? Provide a friendly name for your resource to be used as a label for this category in the project: user  // API Gatewayのリソース名となる
? Provide a path (e.g., /items) /user // API Gatewayでのパス名となる
? Choose a Lambda source Create a new Lambda function // Lambda作成する
? Provide a friendly name for your resource to be used as a label for this category in the project: User  // Lambdaでのリソース名となる
? Provide the AWS Lambda function name: UserFunc  // Lambdaでの関数名となる
? Choose the function template that you want to use: Serverless express function (Integration with Amazon API Gateway)  // 空の関数なのでとりあえずexpressにする
? Do you want to access other resources created in this project from your Lambda function? No // Lambda関数からこのプロジェクトで作成された他のリソースにアクセスしますか?とりあえずNo
? Do you want to edit the local lambda function now? No // Yesにするとエディタ起動
Succesfully added the Lambda function locally
? Restrict API access No
? Do you want to add another path? No
Successfully added resource user locally

Some next steps:
"amplify push" will build all your local backend resources and provision it in the cloud
"amplify publish" will build all your local backend and frontend resources (if you have hosting category added) and provision it in the cloud
amplify バックエンドAPIの作成
amplify add api で作ったAPIはまだソースコードでしかないので、pushしてクラウド上に配置する
$ amplify push

Current Environment: suzuki

| Category | Resource name | Operation | Provider plugin   |
| -------- | ------------- | --------- | ----------------- |
| Function | User          | Create    | awscloudformation |
| Api      | user          | Create    | awscloudformation |
? Are you sure you want to continue? Yes
⠦ Updating resources in the cloud. This may take a few minutes...
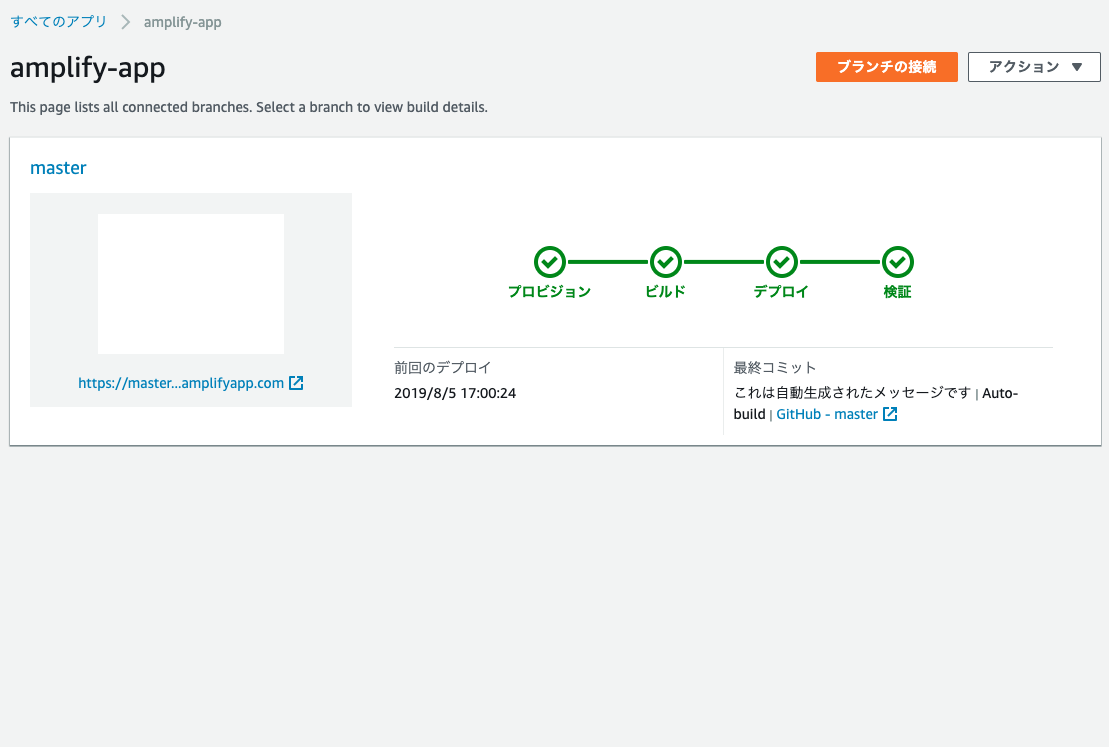
これが完了すると、
API Gatewayにuserリソースが出来て、/userAPIパスが出来て、これが
LambdaのUserFunc-suzuki関数が出来て呼び出すことが出来ます。
でもこのpushはsuzukiの環境であって、先ほどgithubに登録するとmaster環境で動きます。
amplify.yml でバックエンドデプロイの設定
先ほどダウンロードしたamplify.ymlをそのままアプリソースのルートに設置しましょう。
amplify.yml で amplifyPushと記述すれば、
https://gist.github.com/swaminator/7408de774e24ecf031d0d9928f1fbae5
のシェルスクリプトが実行されるようです。
version: 0.1
backend:
  phases:
    # IMPORTANT - Please verify your build commands
    build:
      commands:
        - '# Execute Amplify CLI with the helper script'
        - amplifyPush --simple
frontend:
  phases:
    build:
      commands: []
  artifacts:
    # IMPORTANT - Please verify your build output directory
    baseDirectory: /
    files:
      - '**/*'
  cache:
    paths: []
そして先ほどの追加したapiも含めてGitHubに登録します。
$ git add .
$ git status
On branch master
Your branch is up to date with 'origin/master'.

Changes to be committed:
  (use "git reset HEAD <file>..." to unstage)

  new file:   amplify.yml
  new file:   amplify/backend/api/user/api-params.json
  new file:   amplify/backend/api/user/parameters.json
  new file:   amplify/backend/api/user/user-cloudformation-template.json
  modified:   amplify/backend/backend-config.json
  new file:   amplify/backend/function/User/User-cloudformation-template.json
  new file:   amplify/backend/function/User/function-parameters.json
  new file:   amplify/backend/function/User/src/app.js
  new file:   amplify/backend/function/User/src/event.json
  new file:   amplify/backend/function/User/src/index.js
  new file:   amplify/backend/function/User/src/package-lock.json
  new file:   amplify/backend/function/User/src/package.json
  $ git commit -m "backend deploy"
  $ git push origin master
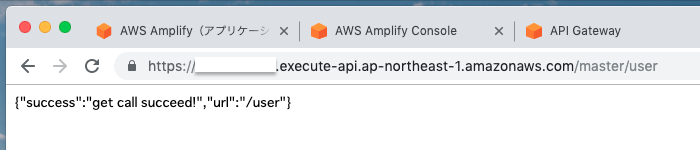
GitHubにプッシュされるとデプロイが発動され、無事本番環境のAPIが動作することがわかりました。
Framework7のフロントエンドのデプロイ環境を構築する
バックエンドが出来たら今度はフロントエンドです。フロントエンドには僕のイチオシUIフレームワークのFramework7を使います。
Framework7の使い方などは以下をどうぞ。
Framework7のアプリ作成
先ほどのアプリソースのルートからディレクトリを一つ作ってそこで作っていきます。バックエンドのソースと混ぜたくないからです。
(frontend ってディレクトリ名でもかっこいかもしれません。)
そして、どこにフロントディレクトリがあっても、後の設定でフロントの公開ディレクトリをamplify.ymlでセット出来ます。
$ mkdir framework7
$ cd framework7/
$ framework7 create
✔ All good, you have latest framework7-cli version.
? What type of the app are you targeting? (Press <space> to select, <a> to toggle all, <i> to invert selection)Simple web app // ここでPWAを選択出来ますが、ここでは一旦Simpleで。
? App (project) name: amplify-app // アプリ名を合わせましょう
? What type of framework do you prefer? Framework7 Core // Vueも選べます
? Choose starter template: Single View
? Should we setup project with bundler? Webpack (recommended)
? Do you want to setup CSS Pre-Processor SCSS (SASS)
? Do you want to specify custom theme color? No, use default color theme
? Do you want to include Framework7 Icons and Material Icons icon fonts? Yes, include icon fonts
✔ Generating package.json
✔ Creating required folders structure
✔ Installing NPM Dependencies
✔ Installing NPM Dev Dependencies
✔ Executing NPM Scripts
✔ Creating project files

✔ Done! 💪

ℹ Next steps:
  - 🔥 Run "npm start" to run development server
  - 🔧 Run "npm run build-prod" to build web app for production
  - 🔧 Run "npm run build-dev" to build web app using development mode (faster build without minification and optimization)
  - 📖 Visit documentation at https://framework7.io/docs/
  - 📖 Check README.md in project root folder with further instructions

Love Framework7? Support project by donating or pledging on patreon:
https://patreon.com/vladimirkharlampidi
因みに、framework7はnpm startで開発可能です。
amplify.ymlでフロントエンドデプロイの設定
先ほどの内容に加えて、frontendのところでframework7ディレクトリに移動してビルドコマンドを実行処理を記述します。
あと、baseDirectoryでフロントエンドとして公開されるディレクトリを指定します。
framework7のビルドでframework7/wwwにビルド物が出来るのでそれを指定します。
version: 0.1
backend:
  phases:
    # IMPORTANT - Please verify your build commands
    build:
      commands:
        - '# Execute Amplify CLI with the helper script'
        - amplifyPush --simple
frontend:
  phases:
    build:
      commands: [
        "cd framework7",
        "npm install",
        "npm run build-prod"
      ]
  artifacts:
    # IMPORTANT - Please verify your build output directory
    baseDirectory: framework7/www/
    files:
      - '**/*'
  cache:
    paths: []
ここまでで試しにデプロイしてみたら以下のエラーが。。。
internal/modules/cjs/loader.js:638
throw err;
^
Error: Cannot find module '/codebuild/output/src705217606/src/easy-app/frontend/build/build.js'
非常にはまりましたが、これはamplifyの生成するgitignoreでbuildディレクトリを無視するようにしているのが原因でした。
framework7でもbuildディレクトリは使っているので無視しないよう以下のように追記します。
#amplify
amplify/\#current-cloud-backend
amplify/.config/local-*
amplify/backend/amplify-meta.json
amplify/backend/awscloudformation
build/
dist/
node_modules/
aws-exports.js
awsconfiguration.json

#framework7
!framework7/build/
GitHubにプッシュしてみます。
$ git add .
$ git commit -m "frontend deploy"
$ git push origin master
無事フロントエンドまでデプロイ出来ると以下のようにトップページのキャプチャが出るんですね。
(しかもちゃんとjsが動作した時のキャプチャ。。地味にすごいこと)
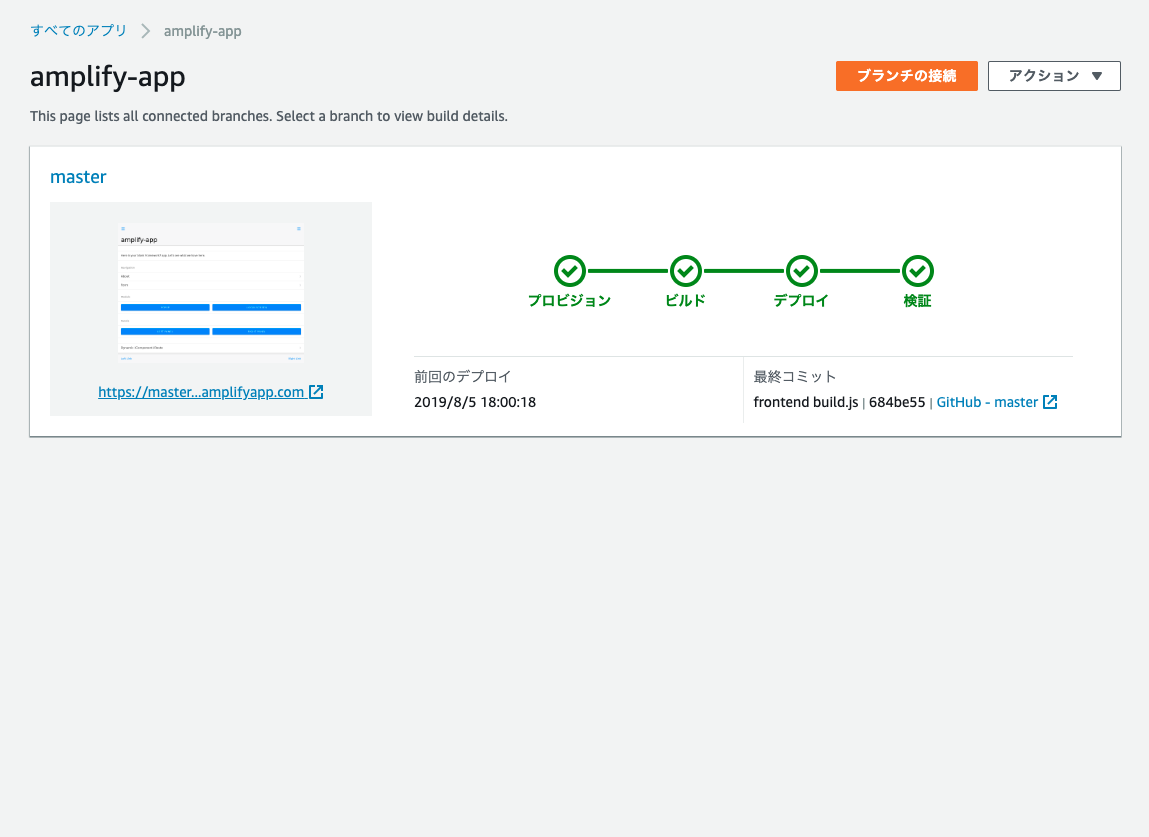
Amplifyでは有名どころの端末の表示も「検証」で軽く表示してくれます。こういうところ、最高です。

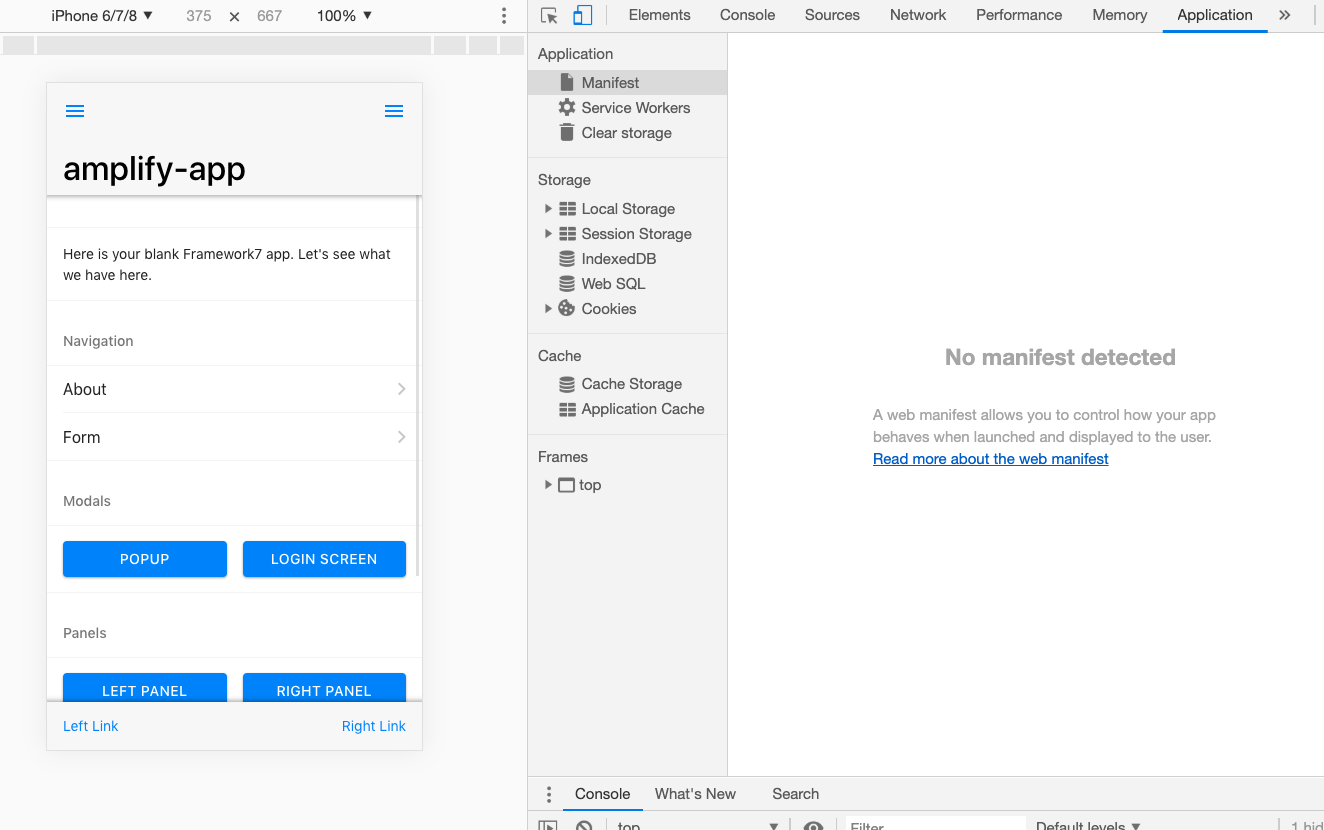
chrome dev tools画面ですがちゃんと動作デプロイされているようですね。AWS Amplify最高すぎます。
まとめ
無事AWS Amplifyを使ってバックエンドとフロントエンドのデプロイ環境を構築することが出来ました。
あとは、フロントアプリからAPIでバックエンドにつなぎこんでいくとアプリが出来上がっていきます。
AmplifyにはCognitoも使えるのでログイン認証はCognitoで作って、API周りはGraphQLを利用するとかなり高速開発が出来るかと思います。
以上、カフーブログがお送りしました。
おまけ:amplify環境を削除
amplify deleteでまるごとaws initで設定した環境を削除出来ます。
今回ローカルではsuzukiという環境名で作って作業していたので、そのsuzuki環境だけ削除されました。
ということで、新しい開発者はamplify initで自分の環境作って用済みなら削除という方法で開発してくといいかもしれませんね。
追記)amplify delete で自分の開発環境を消したら amplify/team-provider-info.jsonの中からその環境名も削除しておいた方がよさそうです。また同じ環境名で初期化しようとしたら既にその環境名はあるよ、と怒られます。